Blog

Left handed M1R increase (make 1 right)

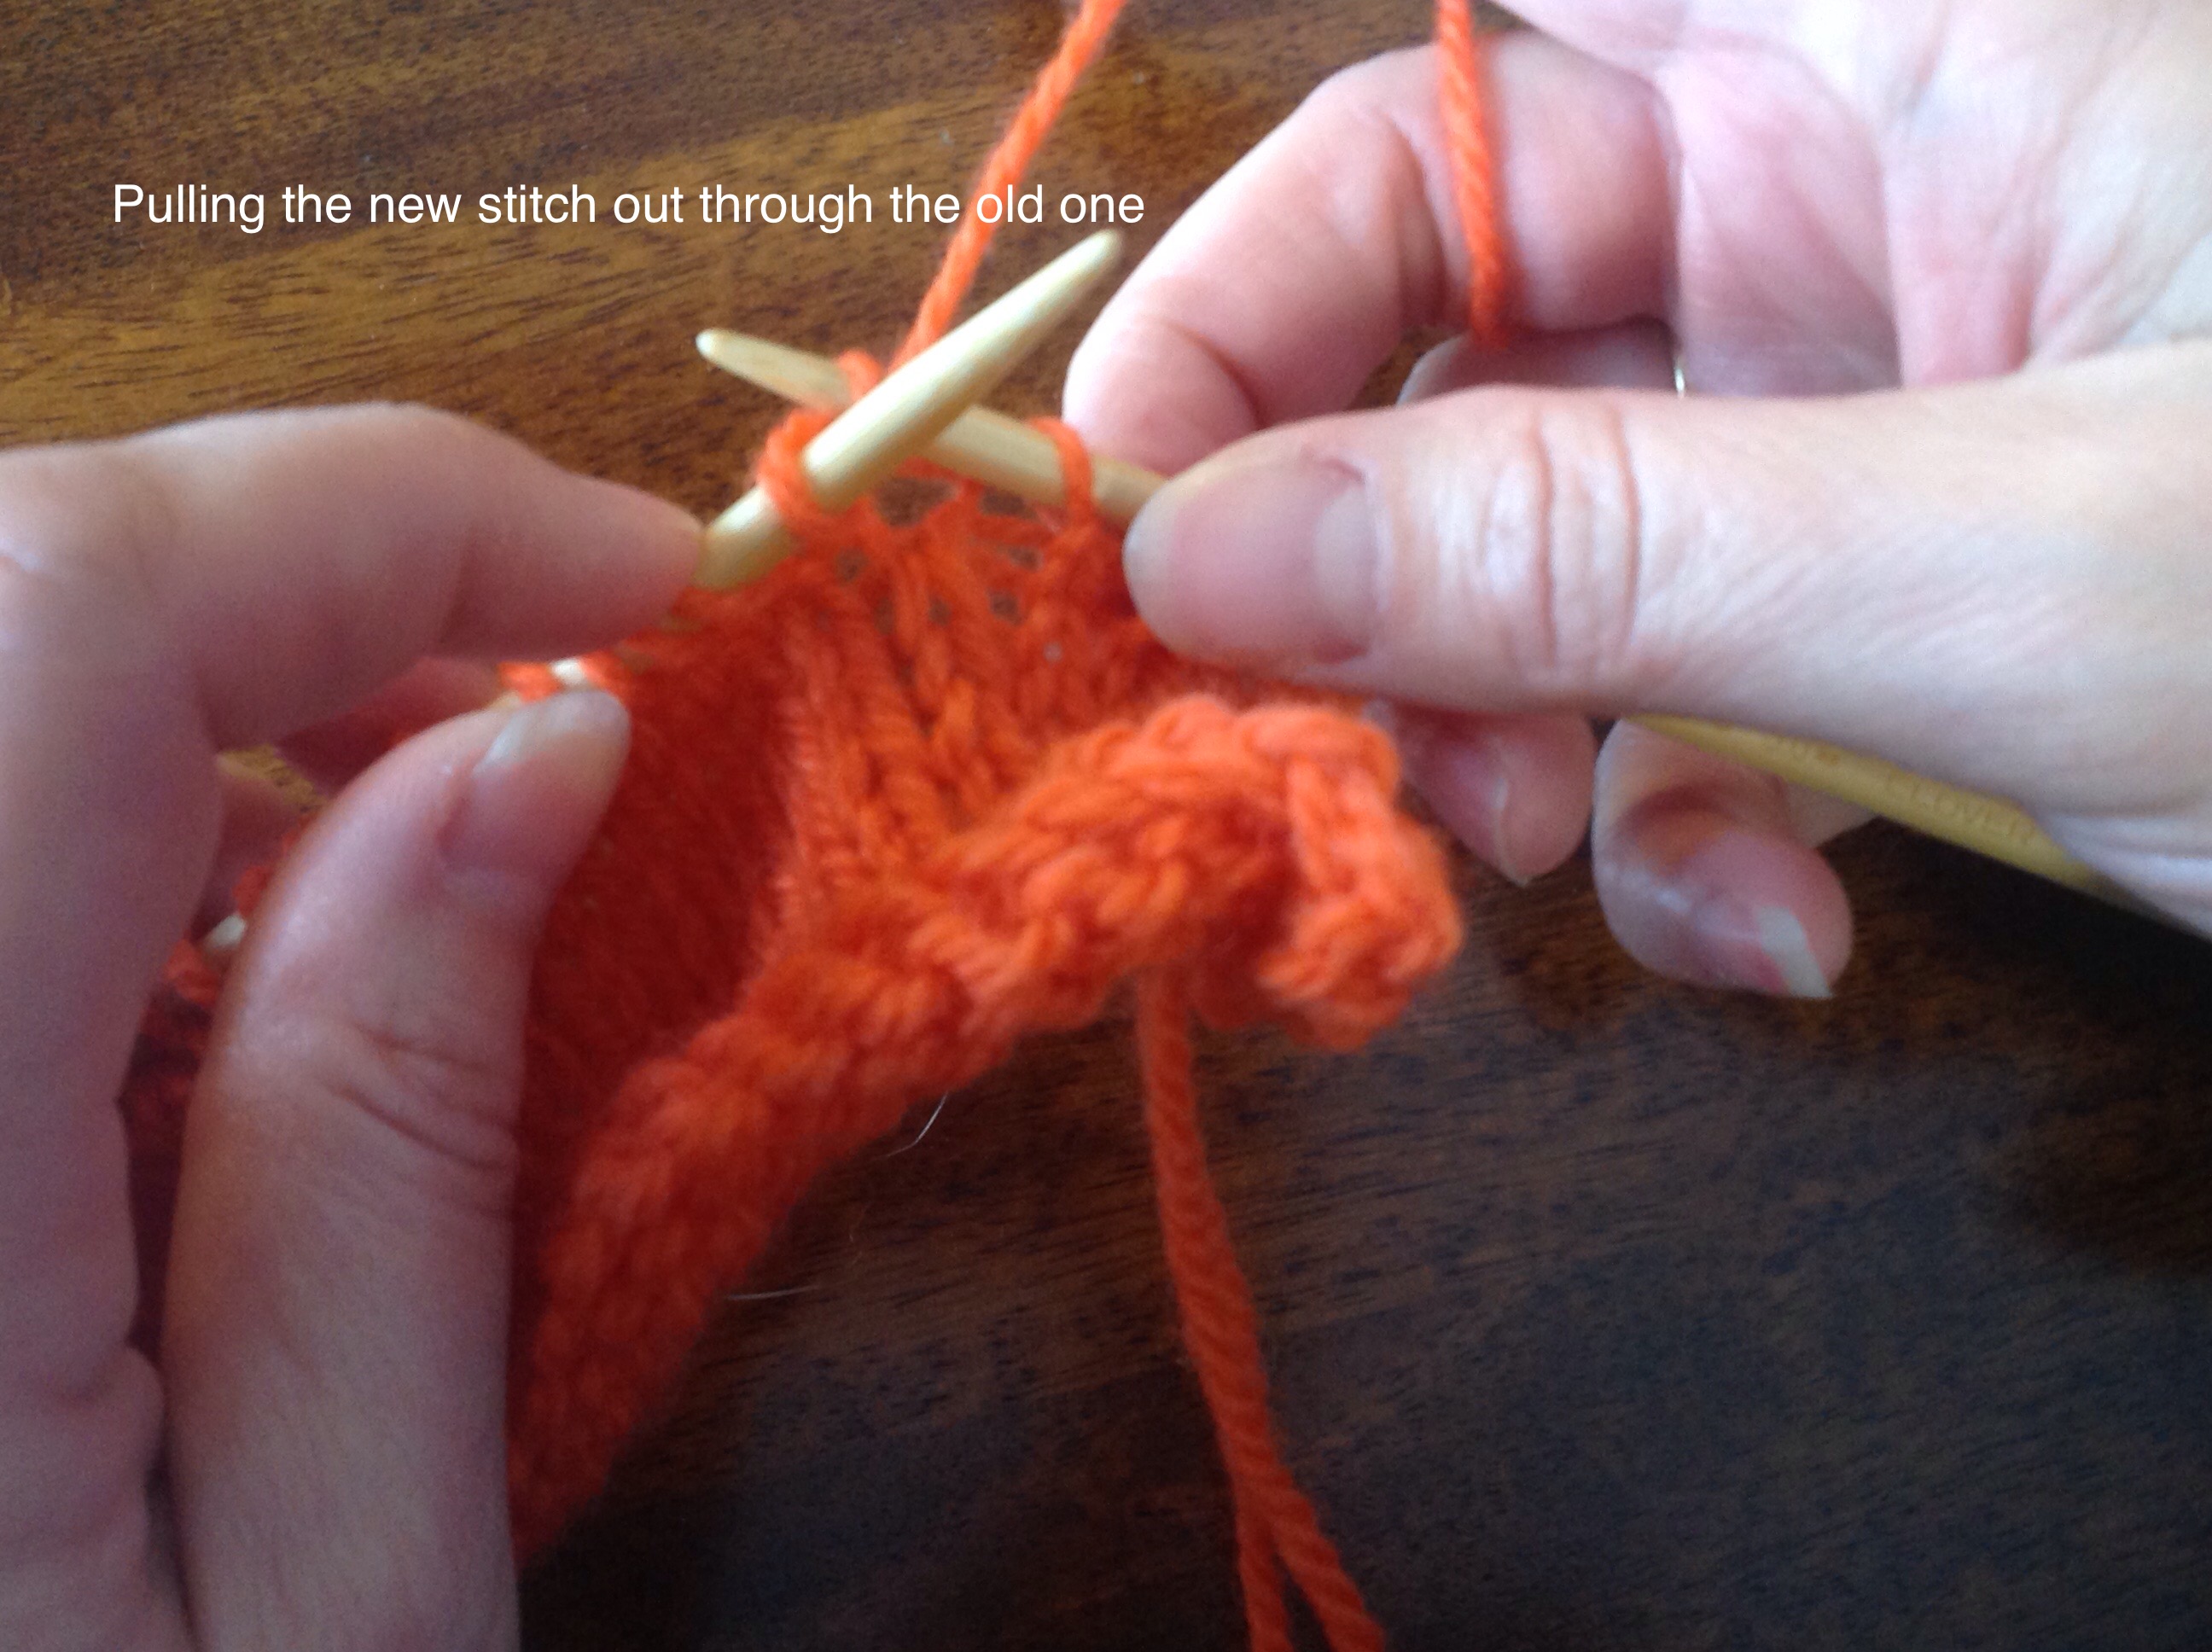
The left handed M1R increase (make 1 right) is very similar in execution to the M1L increase.  The two differences with the M1R increase are that the initial movement of the stitch is performed with the tip of the right hand needle instead of the tip of the left hand needle and the leg in which your left hand needle is inserted into to make the stitch.   As you can imagine these simple changes accounts for the different slant of the increase.

Step 1 of the Left Handed M1R increase

(Click on any image to enlarge)
make 1 right-finding the bar that will be used as the increase

The first step is to locate the bar that runs horizontally between the two stitches that will have the increase.  It is easy to find this bar if you pull the  two needles slightly apart.

Step 2

Left handed M1R increase

Next, using the tip of your RIGHT needle, insert the needle from front to back into the horizontal bar.

Step 3

Left handed M1R increase

Then, from here on out the rest is just like making a normal knit stitch.  The above photo shows, “In through the back door”.

Step 4

Left handed M1R increase

Next you will yarn over or “around the back”.

Step 5

Left Handed M1R increase


Finally, “out through the window and off jumps Jack!”

The Left Handed M1R Increase completed

Left Handed M1R increase

In the above photo you can see the left handed M1R increase with the slant leaning to the right.  Also in the photo you can see a right leaning decrease (k2tog) left over from a previous post.

To recap:  The left leaning increase is made using the tip of the left needle and inserting the needle from front to back, then making the stitch by inserting the needle from right to left in the back leg (the leg closest to you).

The right leaning increase is made using the tip of the right needle and also inserting the needle from front to back, but then making the stitch by inserting the needle into the leading leg as with any knit stitch.

I hope you have enjoyed this brief tutorial.  Please leave a comment below.  If you have any questions, you can also leave those in the comments and I will get back to you shortly.

As always, if you have ideas for future posts feel free to leave me a comment below or send an email.

Happy Knitting!

-Karen Lynn

Left Handed m1L increase (make 1 increase)

Unlike decreases, there are multiple ways to make increases in knitting. Just like the decreases, the increases have directionality and become part of the look of the final piece.  Since there is directionality there are two separate increases.  Today we will look at the left handed m1L increase otherwise known as make 1 left increase.  In the next post we will look at the left handed m1L increase’s counterpart, the m1R.

(Click on any picture to enlarge)
Left handed m1L increase

When creating an increase, in this case, the left handed m1, you will be putting an increase inbetween two stitches and you will be using the bar that runs horizontally between the two stitches.

Continue reading “Left Handed m1L increase (make 1 increase)”

The Left Handed Central Double Decrease (ccd)


The Left handed central double decrease, abbreviated cdd, is a decrease of two stitches.  It is most often used at the points of leaves.  It is a wonderful stitch to know as it makes the points of the leaves look professional.  The reason it looks so beautiful is that the left and right stitch hide behind the middle stitch showing a continuity of the middle stitch from the rows below.  I found this stitch tricky because all the tutorials I found were for right handed knitter, not left handed knitters.  Have no fear, I spent way too much time figuring this out for myself and I gladly share it here with you today.

I warn you this is a multistep stitch, but well worth the time and effort.

If you know knitting terms here are the steps.  If you are unsure about the steps, please follow along below with a picture tutorial and short video at the end.

Slip first stitch as if to purl, slip second stitch as if to purl, put both stitches back on the right hand needle and slip together through the back loops.  Knit the third stitch.  Pass the first and second stitch together over the knit stitch. Continue reading “The Left Handed Central Double Decrease (ccd)”

Left handed SSK- pictures and video

In the last post I showed you how to make the right leaning decrease or k2tog (knit two together).  Today I will show you the the k2tog’s counterpart, the left handed SSK.  For righties these abbreviations tell you what to do when making the stitch:  K2tog=knit two together,  SSK=slip, slip, knit.  I think about these decreases instead in terms of their slant.  So, for me they are the right leaning decrease (k2tog for lefties) and left leaning decrease (ssk for lefties) since the abbreviation does not match how I make the stitch.

Click on any picture to enlarge

Left Handed SSK 1  Left Handed SSK- Step 1

Start by putting your working needle (the left one) two stitches in from the tip of the right needle.

Left handed SSK 2
Another view without the text overlay.

Continue reading “Left handed SSK- pictures and video”

Left Handed K2tog (Knit Two together)

Today I will show you one of the two types of decreases.  In knitting increases and decreases become part of the overall look of the knitted fabric as both have directionality to them.  This is important to know because which one you use does matter and will add to the overall effect of the finished piece.  Like the title suggests, the left handed k2tog (knit two together) is just that, you knit the next two stitches on your right hand needle as one stitch.  Use the same rhyme as you did for the knit stitch here:

In through the front door, around the back, out through the window and off jumps jack.

*Click on any image to enlarge*

Step 1 of the left handed k2tog: In through the front door

Left handed knit two together, in through the front door

As you can see in the above photo I am going into the next two stitches at the same time.  You will treat both stitches as one.

Continue reading “Left Handed K2tog (Knit Two together)”

Left Handed Purl Stitch, how to, tips and rhyme

Today let’s look at the dreaded purl stitch.  I say dreaded, because most knitters prefer the knit stitch over the purl stitch.  I hated the purl stitch when I started learning how to knit, but I forced myself to practice it and honestly now, it is not a big deal.  Last week I showed you the knit stitch and the tiny little Vs it creates.  When you only see the Vs then you are looking at the knit stitch or what is known as stockinette stitch.  Stockinette stitch really refers to the type of fabric that is produced by only showing the knit side which means one row is knit and the other row is purled.  Reversed stockinette stitch is when just the purled side is showing, as in the photo below.

Click on any photo to enlarge

Reverse Stockinette Stitch (Purl Stitch)

Left Handed Purl stitch fabric

Continue reading “Left Handed Purl Stitch, how to, tips and rhyme”

Left Handed Knit Stitch-knitting tips and rhymes

Knitting has only two stitches:  The knit stitch and the purl stitch.  Every design is made up various combinations of these two stitches. You will be able to make these stitches in your sleep once you’ve mastered the motor movements.  It will seem awkward at first, requiring way too much attention and your tension will be tighter than a scrooge’s wallet.  Thus, making it near impossible to insert your needle into the next stitch, but it will get easier with practice!  I promise, it will!  So, let’s look at the left handed knit stitch to start.

Click any image to enlarge

In Through the Front Door

Left handed: in through the front door.

There’s an easy rhyme to help you remember the actions of the knit stitch:

IN THROUGH THE FRONT DOOR, AROUND THE BACK, OUT THROUGH THE WINDOW AND OFF JUMPS JACK.

Continue reading “Left Handed Knit Stitch-knitting tips and rhymes”

Left Handed Long Tail Cast On

Probably one of the hardest things to learn in knitting is the cast on.  There are countless ways to cast on depending on your project’s needs.  Today I will show you the most popular, the (left handed) long tail cast on.  To start the left handed long tail cast on you will have the yarn in your right hand.  Don’t worry!  Your left hand will be doing all of the work!

Click on any image to enlarge

long tail cast on 1 Continue reading “Left Handed Long Tail Cast On”

Anatomy of a Left Handed Knit Stitch

Before I show you the anatomy of a left handed knit stitch, I want to show you what a knit stitch looks like.

Please click on any image to enlarge.

If you look at the above photo you will see some little green Vs.  Those are outlining the knit stitch.  Each V is one stitch.  Each stitch has a leading leg and a back leg.  Continue reading “Anatomy of a Left Handed Knit Stitch”