Left handed knit front and back (kfb)- A picture tutorial

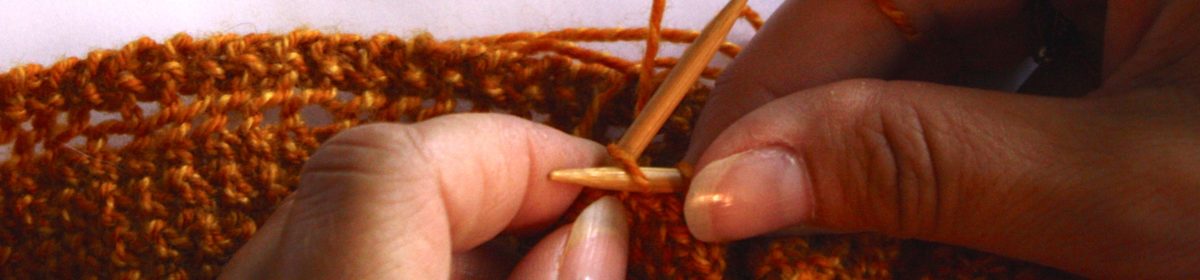
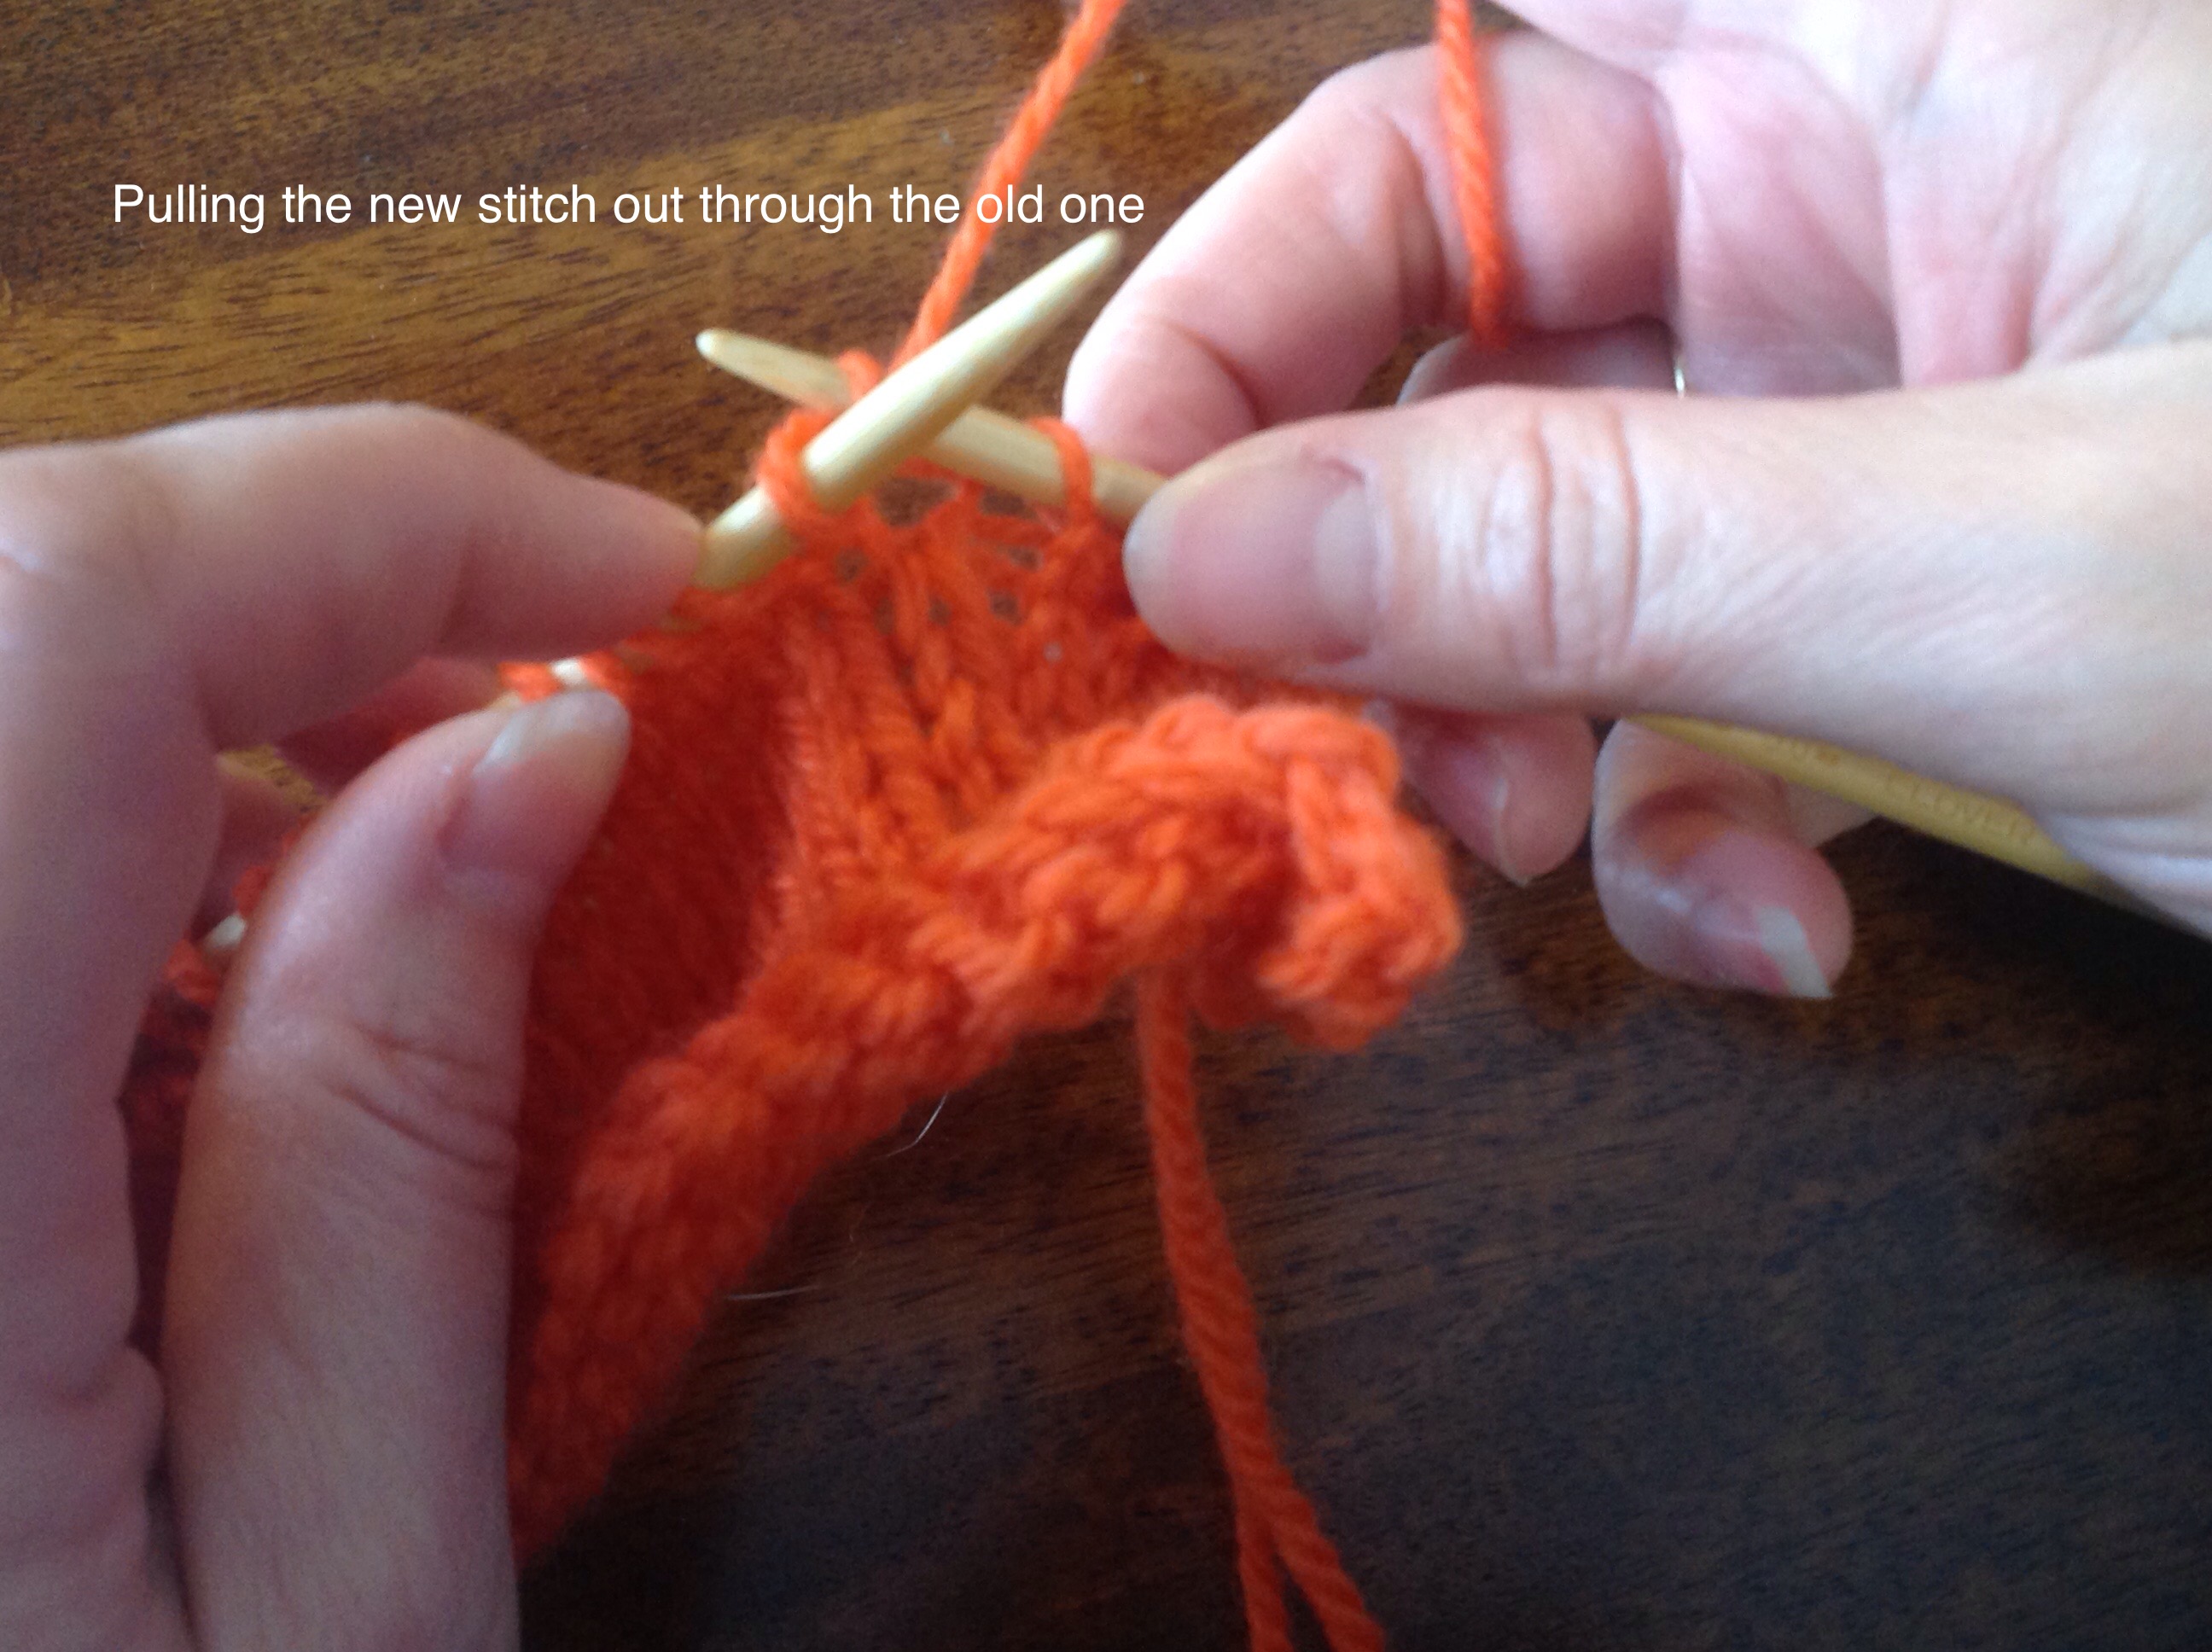
Today let’s look at the very simple and very easy, left handed knit front and back (kfb).   It is an increase that is great for beginner knitters as it does not have directionality like the M1L and the M1R.  Another difference is that the kfb is made in a stitch where as the M1L and the M1R are made between stitches.  This is an important concept to know if you are substituting one increase for another in a pattern (I confess, I do that a lot).  I will explain further at the end of this post.

First, let’s look at when it is a good time to use the left handed knit front and back (kfb).  I typically do not use this increase unless I am working on a project that is inconsequential or where the increase is not part of the overall look of the finished fabric.  In addition, I will use it in a garter stitch pattern or in a ribbing pattern.  The increase blends into the fabric and does not stand out.  The kfb creates a purl bump so that is why it is good for garter stitch or ribbing. Continue reading “Left handed knit front and back (kfb)- A picture tutorial”

Left handed M1R increase (make 1 right)

The left handed M1R increase (make 1 right) is very similar in execution to the M1L increase.  The two differences with the M1R increase are that the initial movement of the stitch is performed with the tip of the right hand needle instead of the tip of the left hand needle and the leg in which your left hand needle is inserted into to make the stitch.   As you can imagine these simple changes accounts for the different slant of the increase.

Step 1 of the Left Handed M1R increase

(Click on any image to enlarge)
make 1 right-finding the bar that will be used as the increase

The first step is to locate the bar that runs horizontally between the two stitches that will have the increase.  It is easy to find this bar if you pull the  two needles slightly apart.

Step 2

Left handed M1R increase

Next, using the tip of your RIGHT needle, insert the needle from front to back into the horizontal bar.

Step 3

Left handed M1R increase

Then, from here on out the rest is just like making a normal knit stitch.  The above photo shows, “In through the back door”.

Step 4

Left handed M1R increase

Next you will yarn over or “around the back”.

Step 5

Left Handed M1R increase


Finally, “out through the window and off jumps Jack!”

The Left Handed M1R Increase completed

Left Handed M1R increase

In the above photo you can see the left handed M1R increase with the slant leaning to the right.  Also in the photo you can see a right leaning decrease (k2tog) left over from a previous post.

To recap:  The left leaning increase is made using the tip of the left needle and inserting the needle from front to back, then making the stitch by inserting the needle from right to left in the back leg (the leg closest to you).

The right leaning increase is made using the tip of the right needle and also inserting the needle from front to back, but then making the stitch by inserting the needle into the leading leg as with any knit stitch.

I hope you have enjoyed this brief tutorial.  Please leave a comment below.  If you have any questions, you can also leave those in the comments and I will get back to you shortly.

As always, if you have ideas for future posts feel free to leave me a comment below or send an email.

Happy Knitting!

-Karen Lynn

Left Handed m1L increase (make 1 increase)

Unlike decreases, there are multiple ways to make increases in knitting. Just like the decreases, the increases have directionality and become part of the look of the final piece.  Since there is directionality there are two separate increases.  Today we will look at the left handed m1L increase otherwise known as make 1 left increase.  In the next post we will look at the left handed m1L increase’s counterpart, the m1R.

(Click on any picture to enlarge)
Left handed m1L increase

When creating an increase, in this case, the left handed m1, you will be putting an increase inbetween two stitches and you will be using the bar that runs horizontally between the two stitches.

Continue reading “Left Handed m1L increase (make 1 increase)”