Today let’s look at the dreaded purl stitch. I say dreaded, because most knitters prefer the knit stitch over the purl stitch. I hated the purl stitch when I started learning how to knit, but I forced myself to practice it and honestly now, it is not a big deal. Last week I showed you the knit stitch and the tiny little Vs it creates. When you only see the Vs then you are looking at the knit stitch or what is known as stockinette stitch. Stockinette stitch really refers to the type of fabric that is produced by only showing the knit side which means one row is knit and the other row is purled. Reversed stockinette stitch is when just the purled side is showing, as in the photo below.
Click on any photo to enlarge
Reverse Stockinette Stitch (Purl Stitch)

So, in the above photo I have just the purl stitch showing, or reverse stockinette stitch. You can tell that it is not the knit stitch because there are no Vs and now you only see frowns and smiles. In the above photo I outlined a purl stitch.
Set up of the Purl Stitch: Move the working yarn to the front of your work

Take the working yarn from behind the needle and move it to the front of your work so that it is closest to you.
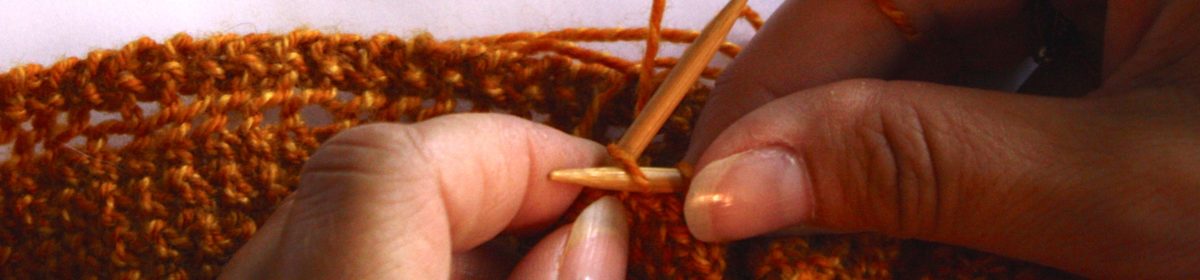
Holding the yarn for the purl stitch

To hold the yarn for the purl stitch I push down on the working yarn as it spans from the needle back to the skein. The yarn then goes over the index finger and under the middle finger, back over the ring finger and under the pinky finger. Basically, the yarn is weaving in and out of my fingers.

Step 1 of the Purl Stitch: In under the fence


Just like the knit stitch, the purl stitch has a rhyme to help you remember the four steps.
IN UNDER THE FENCE, GRAB THAT SHEEP, OUT THROUGH THE FENCE AND OFF WE LEAP.
The first is, In under the fence.
In a previous post I talked about the which part of the stitch is the leading leg. For left handed knitters, the leading leg is behind the needle. When you start the purl stitch, you will insert your needle from behind the leading leg so that the leading leg is now in front of your left hand needle and you are going under the fence (the needle).
Step 2: Grab that sheep

In step 2 you will be forming the new stitch by wrapping the yarn or grabbing your sheep around the left hand needle. To do this, lift your thumb up, which will allow the yarn to to rise up behind the needle. Then use your thumb to push down on the yarn. This will guide the yarn so that your wrap the needle from back to front. This then creates the new stitch on the left hand needle.
Step 3: Out of the fence

Now that you’ve wrapped your needle you need to pull it out of the old stitch or take it out of the fence.
Step 4 of the Purl Stitch: And off we leap
 Now all you have to do is push the old stitch off the needle. Depending on your tension, you may need to push forcibly to get the stitch off.
That’s it! You’ve made the purl stitch! If you are doing a k1, p1 pattern, or alternating knits and purls, don’t forget to move your yarn to behind the needles before making the knit stitch.
I love this method of holding the yarn for the purl stitch! It helped me so much! Thank you!